I found myself in the situation the other day, where I wanted to test some modern web technologies on my development machine, which required HTTPS to be enabled.
Not wanting to create a hosts or DNS entry to match my website and pull over a wildcard certificate, I decided that it would be best to create a self-signed certificate.
I found that this was somewhat difficult because this particular machine is a Windows 7 machine, and most information out there is for Linux, however I found my way.
If you don’t already have OpenSSL installed, go ahead and download and install it. It is easiest to just install Git for Windows, which I already had installed and therefore I didn’t need to perform this step.
Next, make sure that the “OPENSSL_CONF” Environmental Variable is set. You can easily check this by typing echo %OPENSSL_CONF% into a Command Prompt window.
The Java website has a helpful tutorial on how to add Environmental Variables across many different Operating Systems.
If it echoes a path to you, you’re set, otherwise you will need to create the environmental variable. Mine wasn’t set, which caused me problems from the get-go. My path was:C:\Program Files\Git\mingw64\ssl\openssl.cnf
Next, I had to create a Certificate Authority (I will refer to this as a CA from here on). Let’s navigate to a directory where we will store all of our files. For me, I created a folder, SslCertificates in My Documents.

There are many options for how to generate your certs, I decided I wanted to generate a 2048 bit RSA key, and so I did. Make sure you’ve got a password in mind. Since I like to live dangerously… and that this will never leave the local machine, I felt it was ok to use the password “password”.
openssl genrsa -des3 -out rootSSL.key 2048

Next, we will generate our Root CA Cert. We can define how long the cert will be valid for. On the big bad web, you want to strike a balance between maintainability and security, but on our local machine, there’s no reason we can’t generate a certificate which will outlive us!
openssl req -x509 -new -nodes -key rootSSL.key -sha256 -days 14609700 -out rootSSL.pem
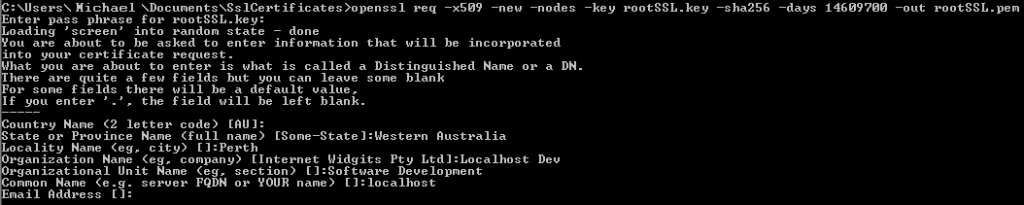
I got a bit silly here and made it exactly 200 years, accounting for the drifting almost day every 4 years (365.2425 days in a year). I think this certificate will out-live me. Otherwise, I guess I’ll generate another one when I’m 225. It will ask for a password here which is the same one we used earlier (‘password’). Other information here can be left at defaults if you want, or you can fill out as much as you like like I did.
Now, you need to import the rootSSL.pem file into your Third-Party Certification Authorities store.
The SSL Store website has is an excellent tutorial explaining improting Root CA certificates in Windows.
Now we are ready to create a Certificate Signing Request (from here I will call a CSR). First, create the file localhost.csr.cnf with the below contents. I would reccomend changing this as you see fit, as my settings may not suit you.
[req]
default_bits = 2048
prompt = no
default_md = sha256
distinguished_name = dn
[dn]
C=AU
ST=WA
L=Perth
O=Software
OU=Dev System
emailAddress=noreply@michael-thompson.net
CN = localhost
Next, we can create the CSR Key and request file. This is quite easy and will, again, require our rootSSL.key password.
openssl rsa -in rootSSL.key -out localhost.key
openssl req -new -sha256 -nodes -out localhost.csr -key localhost.key -config localhost.csr.cnf

Now, we are almost ready to create our signed certificate, but first we need to create another config file. You can use mine and you probably won’t even need to make any changes to it. Call this file localhost.v3.ext
authorityKeyIdentifier=keyid,issuer
basicConstraints=CA:FALSE
keyUsage = digitalSignature, nonRepudiation, keyEncipherment, dataEncipherment
subjectAltName = @alt_names
[alt_names]
DNS.1 = localhost
Once that’s created, we can run the final command, which will create our certificate file. Again, we will need to fill in our rootSSL.key password.
openssl x509 -req -in localhost.csr -CA rootSSL.pem -CAkey rootSSL.key -CAcreateserial -out localhost.crt -days 500 -sha256 -extfile localhost.v3.ext

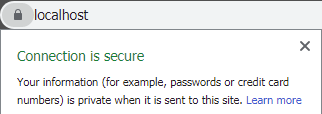
And we’ve done it! Now, we just have to move them to our web server configuration directories, configure our servers, and we are ready to go!